其它资源
其它资源
 友链申请
友链申请
Spring对象如何创建与管理,又如何使用巧妙的方法注入属性呢?
Spring容器管理的对象从何而来
在使用Spring框架的时候,我们或者通过 配置applicationContext.xml 或者通过 注解 等方式来实现容器管理对象。
但是,容器管理的对象从何而来呢?
验证这个问题,我们通过下面的例子来进行测试。
无参构造 setter注入
/* POJO类User */
public class User {
    private String name;
    /*无参构造中加入一个输出语句用以验证是否被调用*/
    public User() {
        System.out.println("User的无参构造!");
    }

    public User(String name) {
        this.name = name;
    }

    public String getName() {
        return name;
    }

    public void setName(String name) {
        this.name = name;
    }

    public void show(){
        System.out.println("name = " + name);
    }
}
写完POJO类之后,我们再来来到 applicationContext.xml 中配置一下 bean,将对象交由 Spring 容器管理。
<?xml version="1.0" encoding="UTF-8"?>
<beans xmlns="http://www.springframework.org/schema/beans"
       xmlns:xsi="http://www.w3.org/2001/XMLSchema-instance"
       xsi:schemaLocation="http://www.springframework.org/schema/beans
        https://www.springframework.org/schema/beans/spring-beans.xsd" >

    <bean id="user" class="com.javastudyway.pojo.User">
        <!-- 将value值注入到name字段中 -->
        <property name="name" value="全家桶"/>
    </bean>
</beans>
/*
 *测试类 Mytest
*/
import com.javastudyway.pojo.User;
import org.springframework.context.ApplicationContext;
import org.springframework.context.support.ClassPathXmlApplicationContext;

public class MyTest {
    public static void main(String[] args) {
        ApplicationContext context = new ClassPathXmlApplicationContext("applicationContext.xml");
        User user = (User) context.getBean("user");
        user.show();
    }
}
这个测试证明两点:
- 创建对象默认调用的是无参构造方法来创建;
- 容器创建对象是在读取配置文件的时候创建的,而不是在 getBean() 的时候创建
带参构造注入
那么,是不是只能通过无参构造来创建对象,并且通过 setter 来注入属性呢?
当然不是,官方文档中给出了三种通过带参构造注入的配置方式:
- Constructor argument name
(通过字段名注入)
You can use the constructor parameter name for value disambiguation,
as the following example shows:
<bean id="exampleBean" class="examples.ExampleBean">
    <constructor-arg name="years" value="7500000"/>
    <constructor-arg name="ultimateAnswer" value="42"/>
</bean>
Keep in mind that, to make this work out of the box,
your code must be compiled with the debug flag enabled so that
Spring can look up the parameter name from the constructor.
If you cannot or do not want to compile your code with the debug flag,
you can use the @ConstructorProperties JDK annotation to explicitly name your constructor arguments.
"请记住,要使这项工作开箱即用,
编译代码时必须启用调试标志,以便Spring可以从构造函数中查找参数名。
如果不能或不想用debug标志编译代码,
可以使用@constructorproperty JDK注释显式命名构造函数参数。"
- Constructor argument index
(通过参数的位置索引注入)
You can use the index attribute to specify explicitly the index of constructor arguments,
as the following example shows:
<bean id="exampleBean" class="examples.ExampleBean">
    <constructor-arg index="0" value="7500000"/>
    <constructor-arg index="1" value="42"/>
</bean>
In addition to resolving the ambiguity of multiple simple values,
specifying an index resolves ambiguity where a constructor has two arguments
of the same type.
"除了解决多个简单值的模糊性外,指定索引还可以解决构造函数有两个相同类型参数时的模糊性。"
- Constructor argument type matching
(通过参数类型匹配注入)
In the preceding scenario, the container can use type matching with
simple types if you explicitly specify the type of the constructor argument by
using the type attribute. as the following example shows:
<bean id="exampleBean" class="examples.ExampleBean">
    <constructor-arg type="int" value="7500000"/>
    <constructor-arg type="java.lang.String" value="42"/>
</bean>
下面我们来对刚刚的例子做些修改再来测试有参的情况。
通过参数位置下标注入
/* POJO类User */
public class User {
    private String name;
    /* 去掉无参构造 */
    public User(String name) {
        this.name = name;
    }

    public String getName() {
        return name;
    }

    public void setName(String name) {
        this.name = name;
    }

    public void show(){
        System.out.println("name = " + name);
    }
}
对刚刚的 applicationContext.xml 做出对应修改,这次使用带参构造器的参数配置,去掉前面的 bean 的配置。
<?xml version="1.0" encoding="UTF-8"?>
<beans xmlns="http://www.springframework.org/schema/beans"
       xmlns:xsi="http://www.w3.org/2001/XMLSchema-instance"
       xsi:schemaLocation="http://www.springframework.org/schema/beans
        https://www.springframework.org/schema/beans/spring-beans.xsd" >

    <!-- 通过参数的下标索引来注入 -->
    <bean id="user" class="com.javastudyway.pojo.User">
        <constructor-arg index="0" value="有参注入"/>
    </bean>
</beans>
/*
 *测试类 Mytest
*/
import com.javastudyway.pojo.User;
import org.springframework.context.ApplicationContext;
import org.springframework.context.support.ClassPathXmlApplicationContext;

public class MyTest {
    public static void main(String[] args) {
        ApplicationContext context = new ClassPathXmlApplicationContext("applicationContext.xml");
        User user = (User) context.getBean("user");
        user.show();
    }
}
输出结果:
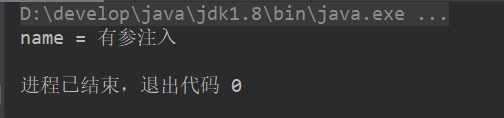
即使我们去掉了无参构造器,去掉了直接通过 `name 值注入,也一样注入成功了。对象一样被创建出来,说明了Spring管理对象的方式可以通过有参来构造。
通过参数类型匹配注入
<?xml version="1.0" encoding="UTF-8"?>
<beans xmlns="http://www.springframework.org/schema/beans"
       xmlns:xsi="http://www.w3.org/2001/XMLSchema-instance"
       xsi:schemaLocation="http://www.springframework.org/schema/beans
        https://www.springframework.org/schema/beans/spring-beans.xsd" >

    <!-- 通过参数的下标索引来注入 -->
    <bean id="user" class="com.javastudyway.pojo.User">
        <constructor-arg type="java.lang.String" value="参数类型匹配"/>
    </bean>
</beans>
测试结果:
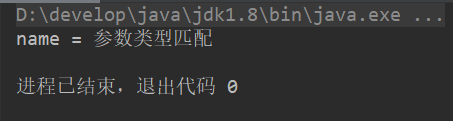
如果是JAVA的基本数据类型,type的值直接写上类型名称即可,但是引用数据类型就需要使用全限定名。
w
所以这里是String就是java.lang.String
但是使用这种方式去配置有很大的弊端,因为我们在创建对象时经常会有同类型的参数不止一个这种情况,如果是这样的情况就不能使用这种方式来配置了。
其他标签
Spring最主要的就是 bean 的配置,此外还有几个标签用于简化 bean 的信息和配置。
例如 alias、import。
alias
alias 标签,顾名思义就是 别名,通过这个标签我们就能够为我们配置的好的 bean 取一个其他的名字,在我们调用 getBean() 获取对象的时候就可以传入别名的参数。
我们修改xml配置和测试调用来说明这个 alias 标签。
<?xml version="1.0" encoding="UTF-8"?>
<beans xmlns="http://www.springframework.org/schema/beans"
       xmlns:xsi="http://www.w3.org/2001/XMLSchema-instance"
       xmlns:context="http://www.springframework.org/schema/context"
       xsi:schemaLocation="http://www.springframework.org/schema/beans
        https://www.springframework.org/schema/beans/spring-beans.xsd http://www.springframework.org/schema/context https://www.springframework.org/schema/context/spring-context.xsd">
    <!-- 这是我们先前配置好的bean -->
    <bean id="user" class="com.javastudyway.pojo.User">
        <constructor-arg type="java.lang.String" value="别名user"/>
    </bean>
    <!-- 为刚刚的bean取一个新的别名 userNew -->
    <alias name="user" alias="userNew"/>
</beans>
在测试类中,我们不再传入 user 给 getBean(), 而是传入别名的 userNew。
import com.javastudyway.pojo.User;
import org.springframework.context.ApplicationContext;
import org.springframework.context.support.ClassPathXmlApplicationContext;
public class MyTest {
    public static void main(String[] args) {
        ApplicationContext context = new ClassPathXmlApplicationContext("beans.xml");
        User user = (User) context.getBean("userNew");
        user.show();
    }
}
运行结果:
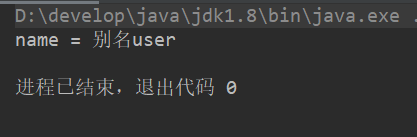
alias 也就一个作用,给我们先前配置好的 bean 重新起个名字以方便管理和阅读。
但是很多时候不会通过 alias 标签来单独配置一个别名,可以在配置 bean 的时候在后面加一个 name 属性。
<bean id="user" class="com.javastudyway.pojo.User" name="userNew,userSecond">
    <constructor-arg type="java.lang.String" value="别名user"/>
</bean>
这也就是 alias 和 bean 的结合体,值得注意的是通过 name 属性我们可以为该 bean 设置多个别名,通过间隔符来区别,使用“,”“ ”“;”(逗号,空格,冒号)等等都可以。
import
import 一般用在团队开发中,将多个配置文件导入合并为一个。
设想这样一个场景,我们有几个人同时开发多个模块,甲使用一个 applicationContext1.xml ,乙使用 applicationContext2.xml,丙使用 applicationContext3.xml。
那我们要整合就要把三个配置文件的内容手动放到一起,这样显然不合实际。
所以这时候import标签的作用就产生了。我们可以通过将三个文件 import 到一个 applicationContext.xml 来将三个配置文件整合到一起。
<?xml version="1.0" encoding="UTF-8"?>
<beans xmlns="http://www.springframework.org/schema/beans"
       xmlns:xsi="http://www.w3.org/2001/XMLSchema-instance"
       xmlns:context="http://www.springframework.org/schema/context"
       xsi:schemaLocation="http://www.springframework.org/schema/beans
        https://www.springframework.org/schema/beans/spring-beans.xsd http://www.springframework.org/schema/context https://www.springframework.org/schema/context/spring-context.xsd">

    <import resource="applicationContext1.xml"/>
    <import resource="applicationContext2.xml"/>
    <import resource="applicationContext3.xml"/>

</beans>
这样配置完成之后,我们就能只通过 new ClassPathXmlApplicationContext("applicationContext.xml") 来读取这个配置文件从而读取到 import 进来的的三个配置文件。
DI依赖注入环境
DI(Dependency Injection),即依赖注入。指容器负责创建和维护对象之间的依赖关系,而不是通过对象本身负责自己的创建和解决自己的依赖。控制反转是通过依赖注入实现的。
依赖:bean对象的创建依赖于容器;
注入:bean对象中的所有属性有容器来注入。
控制反转是依赖注入的一部分,或者说是同一个行为偏重点不同的俩个称呼。
他们是从不能的角度阐述同一个功能,描述的对象不同而已。依赖注入是从程序本身来说,控制反转是从容器来说的。
依赖注入有三种方式:
- 构造器注入
- setter注入
- 扩展注入
构造器注入
构造器注入即前文说到的通过构造器的各种参数匹配来创建。此处不再赘述。
setter注入
为了方便全面的演示 setter 注入,在下面的类中我们加入各种类型属性来充当一个复杂数据类型。
import java.util.*;
public class Student {
    //各种数据类型
    private String name;
    private Address address;
    private String[] books;
    private List<String> hobby;
    private Map<String,String> card;
    private Set<String> games;
    private Properties info;
    private String wife;

    /* 以下是toString和getter/Setter */
    @Override
    public String toString() {
        return "Student{" +
                "name='" + name + '\'' +
                ", address=" + address +
                ", books=" + Arrays.toString(books) +
                ", hobby=" + hobby +
                ", card=" + card +
                ", games=" + games +
                ", info=" + info +
                ", wife='" + wife + '\'' +
                '}';
    }

    public String getName() {
        return name;
    }

    public void setName(String name) {
        this.name = name;
    }

    public Address getAddress() {
        return address;
    }

    public void setAddress(Address address) {
        this.address = address;
    }

    public String[] getBooks() {
        return books;
    }

    public void setBooks(String[] books) {
        this.books = books;
    }

    public List<String> getHobby() {
        return hobby;
    }

    public void setHobby(List<String> hobby) {
        this.hobby = hobby;
    }

    public Map<String, String> getCard() {
        return card;
    }

    public void setCard(Map<String, String> card) {
        this.card = card;
    }

    public Set<String> getGames() {
        return games;
    }

    public void setGames(Set<String> games) {
        this.games = games;
    }

    public Properties getInfo() {
        return info;
    }

    public void setInfo(Properties info) {
        this.info = info;
    }

    public String getWife() {
        return wife;
    }

    public void setWife(String wife) {
        this.wife = wife;
    }
}
在 applicationContext.xml 中我们把基本的架子搭好。
<?xml version="1.0" encoding="UTF-8"?>
<beans xmlns="http://www.springframework.org/schema/beans"
       xmlns:xsi="http://www.w3.org/2001/XMLSchema-instance"
       xmlns:context="http://www.springframework.org/schema/context"
       xsi:schemaLocation="http://www.springframework.org/schema/beans
       https://www.springframework.org/schema/beans/spring-beans.xsd
       http://www.springframework.org/schema/context
       https://www.springframework.org/schema/context/spring-context.xsd">

    <!-- 因为address为引用类型,需要先配置好一个bean给student引用 -->
    <bean id="address" class="com.javastudyway.pojo.Address">
        <property name="address" value="山顶"/>
    </bean>

    <bean id="student" class="com.javastudyway.pojo.Student">
        !--    第一种,普通值注入    -->
        <property name="name" value="Java学习之道"/>
        <!--   第二种,bean注入,引用值需要使用ref    -->
        <property name="address" ref="address"/>
        <!--   数组注入,同样使用ref,注意使用双闭合标签,在property中使用子标签来填充数组     -->
        <property name="books">
            <array>
                <value>红楼梦</value>
                <value>西游记</value>
                <value>三国演义</value>
                <value>水浒传</value>
            </array>
        </property>
        <!--    List注入    -->
        <property name="hobbys">
            <list>
                <value>瞪屏幕</value>
                <value>怼键盘</value>
                <value>戳鼠标</value>
            </list>
        </property>
        <!--    map     -->
        <property name="card">
            <map>
                <entry key="身份证" value="001122334455667788"/>
                <entry key="工号" value="998877665544332211"/>
            </map>
        </property>
        <!--    set     -->
        <property name="games">
            <set>
                <value>BOB</value>
                <value>COC</value>
                <value>LOL</value>
            </set>
        </property>

        <!--    null值注入     -->
        <property name="wife">
            <null/>
        </property>

        <property name="info">
            <props>
                <prop key="邮箱">11111111@qq.com</prop>
                <prop key="性别">男</prop>
                <prop key="username">root</prop>
                <prop key="password">123456</prop>
            </props>
        </property>
</bean>
</beans>
属性注入总结
在 beans 标签中一个 bean 为一个对象, 对象的属性通过 property 标签来注入, property 标签的属性 name 即为对象的属性名。
bean 中的属性若为基本数据类型,直接通过 value 来注入,若为引用类型需要使用 ref 来引用其他配置好的 bean。
对于数据集合,则在property 标签中使用相应的标签来配置,集合的标签名有 list array set map, 前三种都使用 value 来注入属性。
map 因为是使用键值对, 所以需要使用 entry 标签来注入 key 和 value。
特殊类型中还有 properties 类型的配置信息可以注入,该属性需要使用 props 标签来包裹多个 prop 标签。
prop 的属性 key 为 properties 的 key,标签内容为 value。需要和 map 的 entry 标签区别,entry 标签是单闭合标签 key 和 value 都是在通过属性配置。
除了这几种属性之外,还可以直接注入 null, 在 property 中直接使用
标签即可。
同样的,再安排上一个测试类:
import com.javastudyway.pojo.Student;
import com.javastudyway.pojo.User;
import org.junit.Test;
import org.springframework.context.ApplicationContext;
import org.springframework.context.support.ClassPathXmlApplicationContext;
public class MyTest {
    @Test
    public void test1() {
        ApplicationContext context = new ClassPathXmlApplicationContext("applicationContext.xml");
        Student student = (Student) context.getBean("student");
        System.out.println(student);
    }
}
输出结果为:

以上属性全部注入成功。
扩展方式注入(命名空间)
Spring 官方文档中对命名空间有这样一段描述:
Spring supports extensible configuration formats with namespaces,
which are based on an XML Schema definition.
However, the p-namespace is not defined in an XSD file and exists only in the core of Spring.
"Spring支持带有名称空间的可扩展配置格式,名称空间基于XML模式定义。
然而,p命名空间并没有在XSD文件中定义,它只存在于Spring的核心中。"
即说明了Spring还可以使用一些扩展的可支持格式化的标签,但是需要引入命名空间。
Spring 的命名空间 P命名空间 C命名空间。
要说明这个两个命名空间的作用和使用方法。我们重新引入一个POJO类 -- User。
public class User {
    private String name;
    private int age;

    public User() {
    }
    /*加入有参构造,用于演示C命名空间*/
    public User(String name, int age) {
        this.name = name;
        this.age = age;
    }

    @Override
    public String toString() {
        return "User{" +
                "name='" + name + '\'' +
                ", age=" + age +
                '}';
    }

    public String getName() {
        return name;
    }

    public void setName(String name) {
        this.name = name;
    }

    public int getAge() {
        return age;
    }

    public void setAge(int age) {
        this.age = age;
    }
}
P命名空间
在前面的文章中,讲到了 Spring 的配置文件可以自定义文件名称。
Spring文件配置详见:
这次我们不再使用官方给定的 applicationContext.xml 来作为配置文件的名称,而是使用与类名相同的userbean.xml来作为配置文件名称。
<?xml version="1.0" encoding="UTF-8"?>
<beans xmlns="http://www.springframework.org/schema/beans"
       xmlns:xsi="http://www.w3.org/2001/XMLSchema-instance"
       xmlns:context="http://www.springframework.org/schema/context"
       xmlns:p="http://www.springframework.org/schema/p"
       xmlns:c="http://www.springframework.org/schema/c"
       xsi:schemaLocation="http://www.springframework.org/schema/beans
        https://www.springframework.org/schema/beans/spring-beans.xsd
        http://www.springframework.org/schema/context https://www.springframework.org/schema/context/spring-context.xsd">
        <!--上面第五行中出现了一个P,该行即为引入P命名空间,
            引入之后便可以使用P命名空间来注入。
            对应的下面第一行的C就是C命名空间-->


    <!-- p命名空间注入 -->
    <bean id="user" class="com.javastudyway.pojo.User" p:name="Java学习之道" p:age="4"/>

    <!-- C命名空间,通过构造器注入:construct-args -->
    <bean id="user2" class="com.javastudyway.pojo.User" c:_0="CoderJun" c:age="4" scope="prototype"/>

</beans>
通过上面的 P命名空间 的演示,相信你能够看出来使用P命名空间的第一个好处了。
就是配置文件在编写的时候可以省去很多的步骤,不用在 bean 的标签中加入 property 子标签去赋值。
使用方法就是 p: 后面跟对象的属性名称再直接赋值即可。
我们用最有力的方式来说明这个方法的可行性。在前面的测试类中加入 test2() 方法,读取 userbean.xml 获取一个 User 对象来看看。
/*测试P命名空间的方法*/
@Test
public void test2(){
    ApplicationContext context = new ClassPathXmlApplicationContext("userbean.xml");
    /*getBean的时候第二个参数加入 对象的.class对象 就不会返回Object对象,不需要强转*/
    User user = context.getBean("user", User.class);
    System.out.println(user);
}
获取到的user对象为:
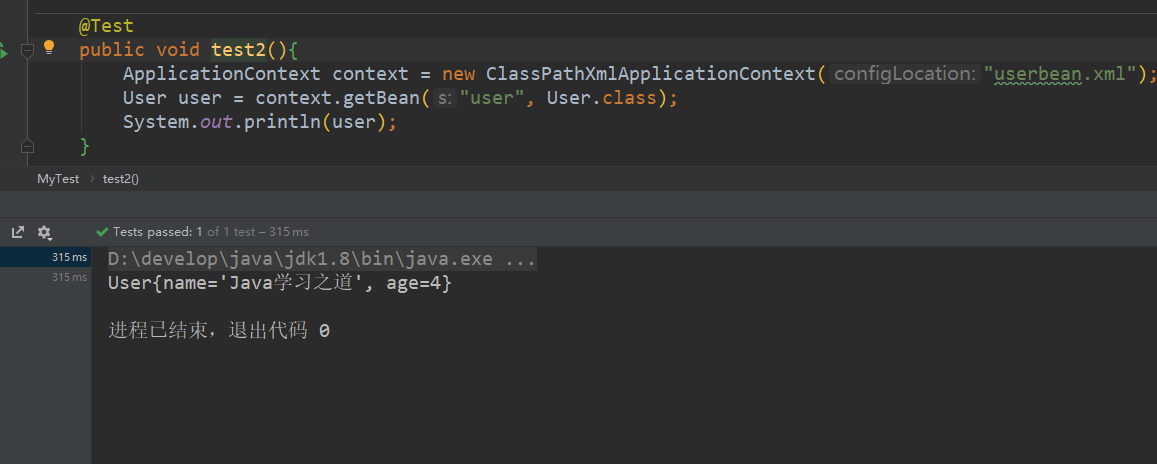
属性与使用 P 命名空间注入的相同,说明P:name, p:age皆是对应注入成功了。
C命名空间
P命名空间 是直接给对象的属性注入值,那么 C命名空间 又有说明神奇的地方呢?
看看官方文档中的介绍:
Similar to the XML Shortcut with the p-namespace,
the c-namespace, introduced in Spring 3.1,
allows inlined attributes for configuring the constructor arguments rather then nested constructor-arg elements.
"与具有p-namespace的XML Shortcut相似,在Spring 3.1中引入的c-namespace允许使用内联属性来配置构造函数参数,而不是嵌套constructor-arg元素。"
C命名空间必须是要求属性有对应参数的构造器,由此可见,P命名空间对应于Setter注入,而C命名空间对应着构造器注入。
使用 C命名空间 同样需要导入命名空间,在 userbean.xml 中我们已经在P命名空间下面导入。
配置文件userbean.xml中我们在C命名空间中配置的第一个参数 c:_0="CoderJun",相信你已经能够猜到 _0 是什么了,没错,就是构造器的参数位置索引,即下标。
POJO类中的有参构造第一个为 String name,所以 c:_0 对应的就是name这个参数。
user2 的注入结果如何呢?
毫无疑问是 -- User{name='CoderJun', age=4}
扩展方式注入注意点
- P命名空间与C命名空间都不能直接使用,需要导入xml约束。
<!--存在于beans标签的属性位置-->
xmlns:p="http://www.springframework.org/schema/p"
xmlns:c="http://www.springframework.org/schema/c"
- C命名空间可以通过构造器参数的位置下标来注入,但是不建议使用索引的方式。
标题:Spring对象如何创建与管理,又如何使用巧妙的方法注入属性呢?
作者:spirit223
地址:https://www.mmzsblog.cn/articles/2021/02/18/1613635462347.html
如未加特殊说明,文章均为原创,转载必须注明出处。均采用CC BY-SA 4.0 协议!
本网站发布的内容(图片、视频和文字)以原创、转载和分享网络内容为主,如果涉及侵权请尽快告知,我们将会在第一时间删除。若本站转载文章遗漏了原文链接,请及时告知,我们将做删除处理!文章观点不代表本网站立场,如需处理请联系首页客服。• 网站转载须在文章起始位置标注作者及原文连接,否则保留追究法律责任的权利。
• 公众号转载请联系网站首页的微信号申请白名单!